Search

Blog

Hello everyone!

CallebautRuby #RubyChocolate #TheoryPost

After a while of using Callebaut Ruby, I’m here to share with you a little of my own introspection of this so-called “4th type of chocolate”.

Firstly, to sum it up, it’s no fourth kind of chocolate or anything. It’s just a genius business and marketing idea!

When it was launched last year by Callebaut, all the chefs around the world were going insane about it. And I mean why not! When someone comes and tells you that they’ve made a couverture which is supposedly the “Fourth Kind of Chocolate” your inner chef/Baker is bound to be curious!

So what is this chocolate?
Well, Callebaut hasn’t shared what it is, but here’s what I think.

Before you could understand what I’m talking about, you need to know how chocolate is made from the theobroma cacao tree, for that, you need to read this –
https://smritisspecial.in/theory-of-chocolate/

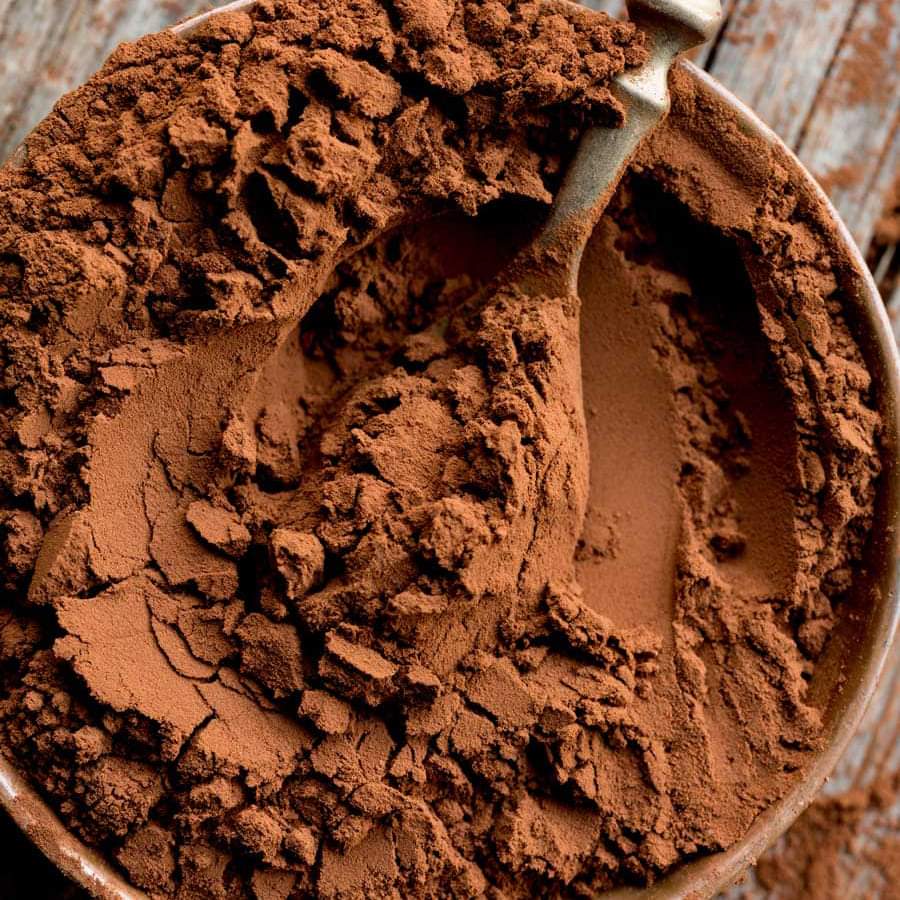
  1. A lot of natural cocoa beans (including the ones grown in India) in their raw or semi Fermented stage are pink/purple in colour. As they ferment more and then dry and roast, they change colour to a burgundy/brown depending upon the way they have been dried and roasted… This gives chocolate its final brown colour.

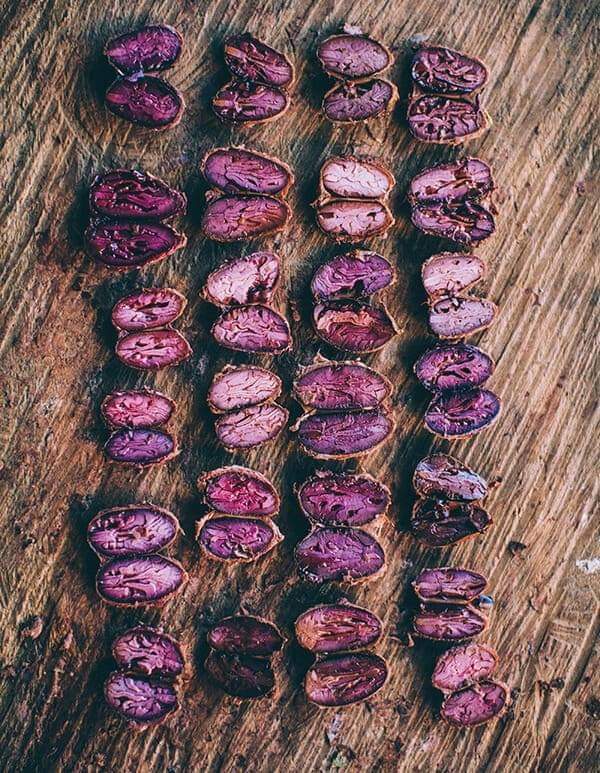
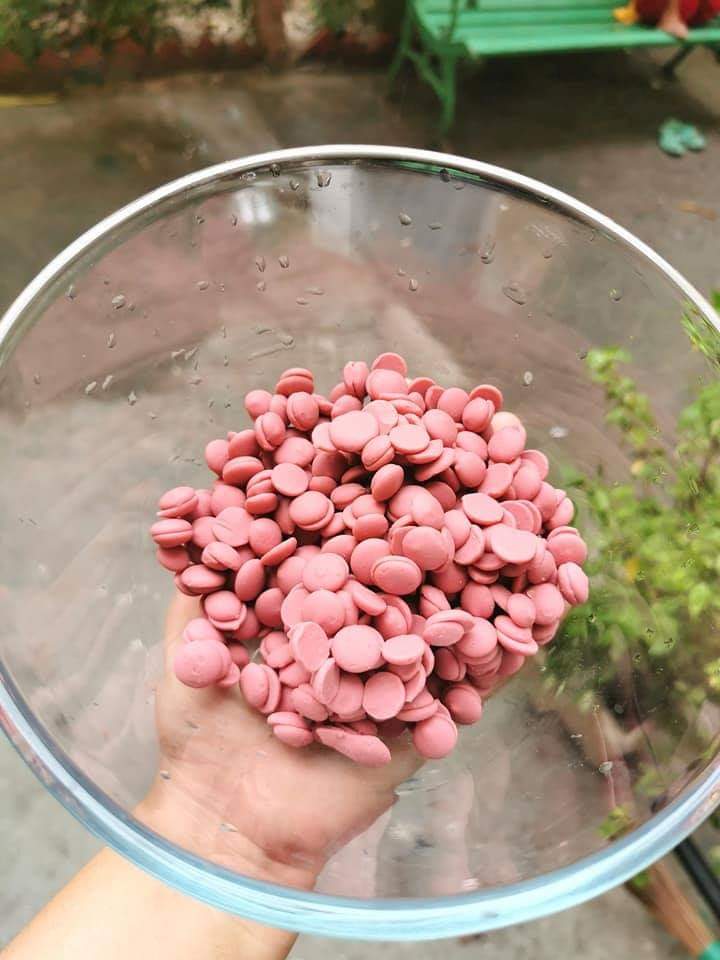
This pink chocolate might be a colour achieved from spray drying or flash drying the semi Fermented beans and subjecting it to citric acid to stop the colour from changing.
(You know how we squeeze some lemon juice on cut pieces of apple or avocado to keep it from changing colour, it’s the same principle here)

Please go to the images and read the ingredients of this chocolate. And note that citric acid is one of the ingredients.

  1. Fermentation of beans, drying and roasting helps develop the flavour of cocoa beans which then becomes chocolate.
    These dried beans in their natural pink colour would be bitter because it not been Fermented or roasted well. So they now have to add Milk Powder, sugar and extra cocoa butter to mask the bitterness. Not just that, they add “natural vanilla flavour” (not pure vanilla extract) which is a chemical flavouring to mask the Cacao beans too.
    What kind of fine chocolate would have artificial flavouring added to it?
  2. The “fruity” flavour that this chocolate claims to have is a result of a general misunderstanding of the word “Fruity”.
    There’s a difference between FRUITY and ZINGY.
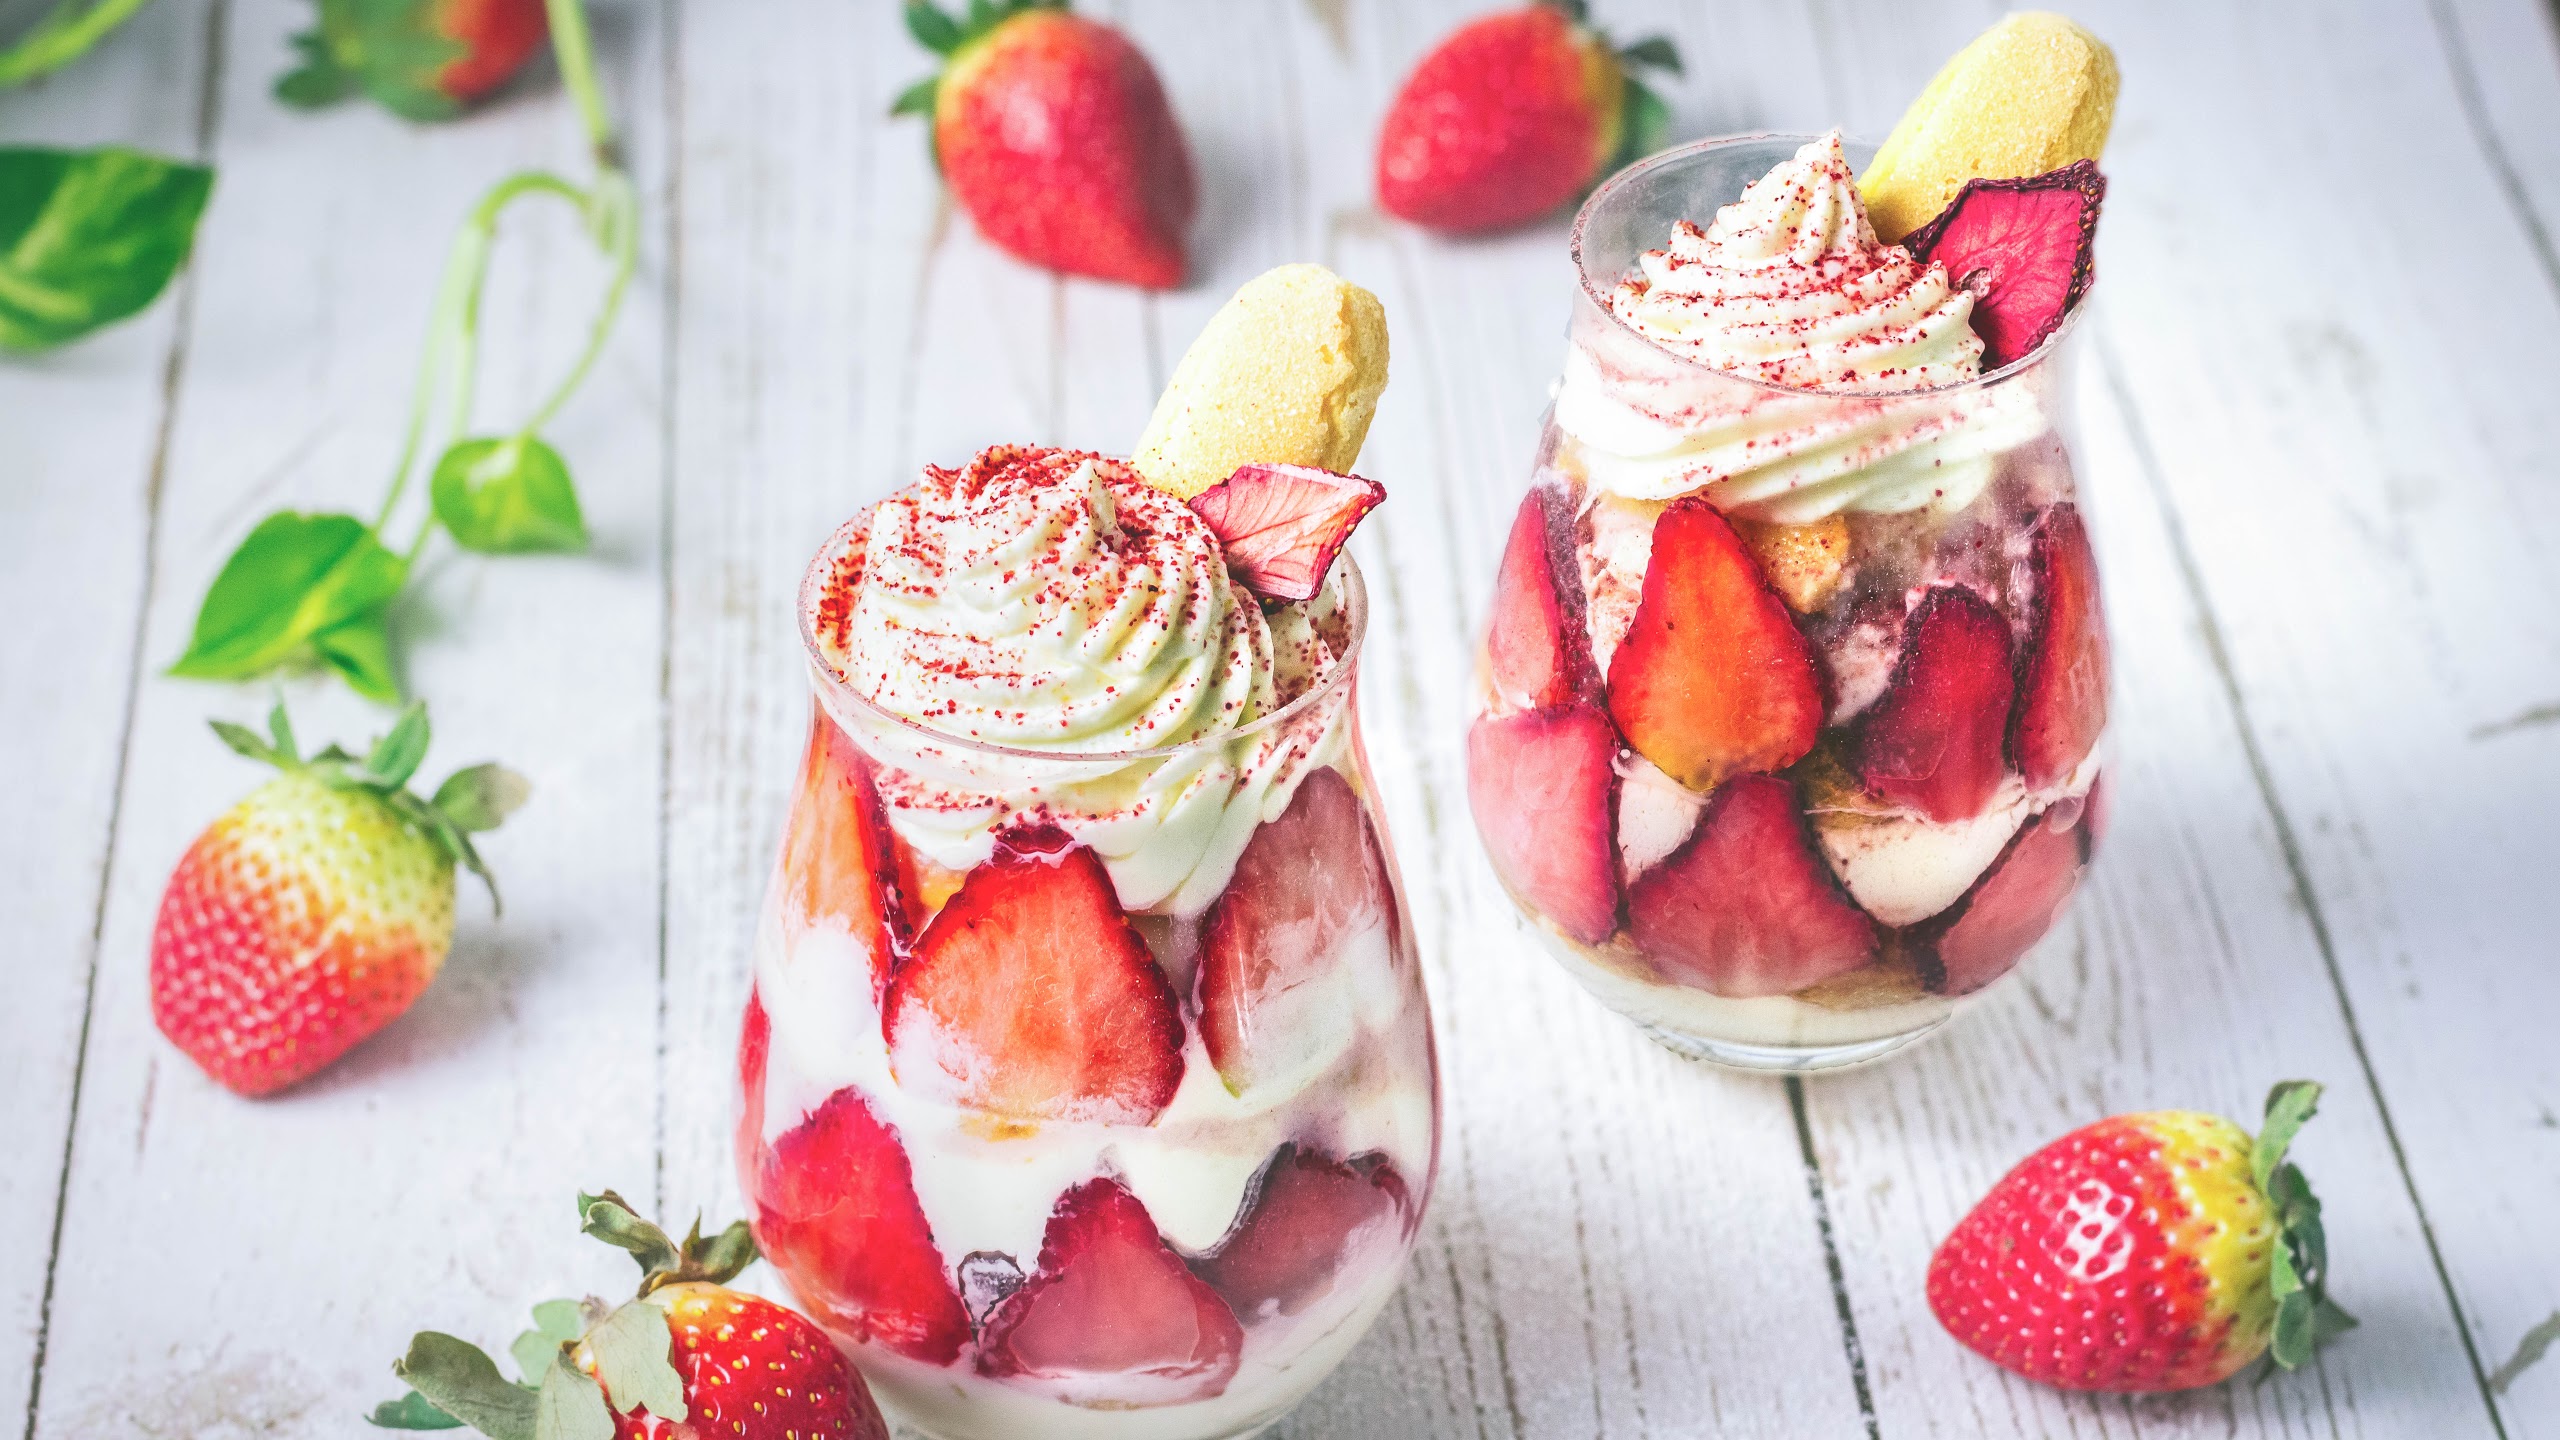
    Fruity is a floral, sweet and sour note. Eg. Strawberries, Cherries, Raspberries, Mango etc.
    Zingy is straight-up sour. Like Lemon or Lime.

The sour note of this chocolate comes from the citric acid added to this chocolate.

Also, this chocolate changes colour if subjected to heat even at 100 degree C. So really the pink colour can remain pink if used in a cold medium.

Overall for me, it is unfermented, unroasted milk chocolate with added citric acid to it.
It’s not the fourth kind of chocolate.

This article is going to help you to choose chocolate suitable for your recipes.
Before reading this article, please make sure to read my Theory of Chocolate Part 1 –
https://smritisspecial.in/theory-of-chocolate/

Let’s get one thing out of the way first, we are talking about CHOCOLATE here NOT compound. COMPOUND IS NOT CHOCOLATE.

OK. Shall we start?
When we talk about Chocolate in general, the primary categorization is according to how chocolate has been made –
1) White (Cocoa Butter + Milk Powder + Sugar)
2) Milk (Cocoa Liquor + Milk Powder + Sugar)
3) Dark (Cocoa Liquor + Sugar)

If you’ve read Part 1 of this article, then you know the detailed difference between these 3 kinds of Chocolates.

➡️ When it comes to taste, we can do the following categorization –
1) WHITE
2) MILK
3) SEMI SWEET
Slightly less sweet and more intense than regular Milk chocolate but this can be – milk or dark.
4) BITTERSWEET
Tastes bitter with some sweet notes – Usually Dark.
5) DARK
A bit more intense and less sweet than bittersweet.
6) BITTER
These, in general, are Dark Chocolates which are bitter.
7) UNSWEETENED
These can be either 100% chocolate which is basically Chocolate Liquor. Or can be Chocolate with sugar substitutes like Stevia or Erythritol.

➡️ Now, perfection lies in understanding what kind of chocolate you’re dealing with.
Recipes are always going to tell you to use Milk Chocolate or Dark or White, but all Milks, Whites or Dark Chocolates are not the same. In fact, each one of them is different.
For eg. you can have Dark/Milk Chocolates that are – 50%, 66%, 72%, 80%, 90% and 100% as well.
Are they all the same? No. Why?
Because the percentage tells you how much of the product is Cocoa. And the rest is going to be sugar (in case of Dark) and sugar + milk powder (in case of milk). So straight up, if you’re going to replace a 72% Chocolate in a recipe with a 50%… What do you need to do?
Reduce sugar in the recipe.
Will it give you the same result as using a 72% chocolate? No. Because 72% will be more intense. But if 50% is all you have, then at least your final product will not be overly sweet if you smartly reduce the sugar content of the recipe.

➡️ Shall we get more deeply into it?
Remember from part 1 of the article, how I explained what the percentage of Cocoa indicates in chocolate?
It indicates the % of the product which is derived from the Cacao Fruit.
It can be all Cocoa Liquor, it can be Cocoa Butter, it can be Cocoa Powder. It can also be a combination of any of these.

Now, If there are 2 companies, both having products with the same percentage of Cocoa, say 72%. Are they both going to be the same product?
No!
You need to check the ingredients at the back of the packaging.
If it’s a Dark Chocolate made only with Cocoa Liquor + Sugar, then you know that 72% is straight up Cocoa Liquor.
But if the packaging says – Cocoa Liquor + Cocoa Butter + Sugar
Then you know that 72% comprises of both Cocoa liquor and Cocoa butter. Which means that this is going to be less intense than the other company’s 72%.
But this also means that this is going to be more ‘fatty’ commonly perceived as ‘more creamy’ on the palate.

Sometimes you can have both chocolates with added Cocoa butter, and often times companies don’t specify as to how much of the product is Cocoa butter and how much is Cocoa liquor, they just indicate the total percentage of Cocoa.
So, I would use a higher cocoa butter chocolate for patisserie (Ice Creams, Mousse, Cheesecake, Anglaise etc.) and a lower Cocoa butter chocolate for baking (like chocolate chip cookies)

➡️ Shall we get even further into it?
(Stay with me. I’m not trying to confuse you, I’m only trying to give you more insight into this)

Now let’s say, there are 2 companies, both have the same 72% Dark Chocolates, both have the same breakdown of the 72%. Are they now the same product?
NO!
But why? They have the exact same breakdown of ingredients, then why are they still not the same?
Now is where we get more deeply into it.
Here’s where there can be two differences –

  1. One chocolate can have a higher temperature roast than the other (remember from part 1 of the article how I told you that Cocoa Beans are roasted in the chocolate-making process?!!)
    The higher roast will indicate a more bitter flavour.
    It can be a gentle and consistent hight temp, which can lead to a more ‘evenly pleasant’ bitter flavour. Or it can be a very high temp roasting resulting in a ‘sharp bitter’ almost ‘burnt’ flavour.
    Chocolates which use beans with such high roasts, usually have a lot of sugar added to mask the bitterness, or have added flavouring agents or are used in Milk chocolates, because Milk Powder neutralizes a lot of these bitter notes.
    Most commercially available cheaper chocolate like Cadbury, use inferior quality beans with high/almost burnt roasts. They don’t really care about this stage of the production, to keep costs down. They anyway add a ton of flavouring agents or milk powder to make an ‘acceptable tasting’ chocolate product in the end.
  2. Cocoa Bean used in one chocolate can be single-origin compared to the other which can be a mixed bag.
    Single-origin chocolate is made with Cocoa beans of the ‘same-origin’, usually the ‘same species’.
    This can greatly affect the flavour of the chocolate. Using Beans of the same species gives a much more robust and ‘specific’ flavour to the chocolate than using a bunch of mixed beans.

In this case, all you can do is to taste the product and judge.

➡️ Let us now talk about another important aspect.
A lot of beginners think that the only difference between Milk and Dark Chocolate is that the former is sweeter than the latter.
Now, if you’ve read the part 1 of this article, then you’ll know the real difference between Milk and Dark chocolate is that the former has Milk Powder added to it.
So, if you have two 50% Chocolates, it is possible that one is Milk and the other is dark.
For eg. Bournville is a Milk Chocolate (even though it is advertised as dark) because of the addition of milk powder in the ingredients list, as opposed to a 50% Kocoatrait Chocolate which is Dark, which doesn’t have milk powder.
This is going to influence the flavour hugely. So before using any chocolate, make sure to read the ingredients and not be mislead by false marketing.

I hope you now have a little more insight as to how to choose the perfect chocolate for whatever recipe you’re following. The key is to taste and read about the product you’re using and then make the judgement call.

I know you’re going to ask me for brands of chocolates. The ones I proudly recommend are the ones which are Made In India – Kocoatrait, Cocoacraft, Mason & Co.
Other than this, I’ve not tried Indian Chocolate.
There’s lots more to explore.

What brand I write here, does not matter at all. What matters is your own experience with chocolate. The more you pay attention to your ingredients, the better your product will be.

Ingredients –

  1. Urad Dal – 1/4 cup
  2. Channa dal – 1/4 cup
  3. Dry chilli – 8
  4. Sesame seeds – 1/4 cup
  5. Asafoetida – 1/2 tsp
  6. Salt – 1.5 tsp
  7. Peanuts – 1/4 cup
  8. Sugar – 1 tbsp (optional)
  9. Flaxseed – 2 tbsp
  10. Chia seeds – 2 tbsp
  11. Desiccated Coconut – 1/2 cup

Procedure –

1) Roast all ingredients one at a time in a dry skillet till lightly golden and fragrant. Except for Salt, Sugar and Asafoetida.
2) Let everything cool down completely.
3) Grind together with Salt, Sugar and Asafoetida into a coarse mixture4) Store in an airtight container in the fridge.

Hi everyone!

A couple of days back I wrote a post about how to do basic Pricing for small-time Baking Businesses – https://smritisspecial.in/lets-talk-pricing-part-1/

Some of you wanted an example so here it is.
This is the costing breakdown of my – EGG FREE FUDGY BROWNIE
The recipe for this is available on my Youtube Channel – https://youtu.be/pYfS0PAlWVk
While you’re at it, Subscribe for love! ❤️😁😁

This recipe makes approximately 1 kg Brownie i.e. 16 standard pieces.

Just remember, costing is subjective to each and every person according to a LOT of variables. So, take this as an understanding, NOT as a set price that you should charge.

🔶STEP 1
Cost of ingredients :

➡️COUVERTURE DARK CHOCOLATE –
₹1245/- per kg
So, cost for 100g = ₹120/-

➡️COUVERTURE MILK CHOCOLATE
₹1339/- per Kg
So, cost of 150g = ₹200/-

➡️BUTTER
₹450/- per Kg
So, cost of 100g = ₹45/-

➡️CONDENSED MILK
Can of 400g (Milkmaid) = ₹115/-

➡️SUGAR
₹60/- per Kg
So, cost of 40g ~ ₹3/-

➡️ALL PURPOSE FLOUR (Maida)
₹86/- per Kg
So, cost of 100g ~ ₹9/-

➡️COCOA POWDER
₹600/- per Kg
So, cost of 35g = ₹21/-

➡️COFFEE POWDER
₹2300/- per Kg
So, cost of 2 tsp (about 6-8g) ~ ₹19/-

➡️OREO BISCUITS
For 250-300g total – ₹60/-

Total Cost of Ingredients – ₹592/-

🔶STEP 2
Wastage Cost – Let’s assume it is 5%
Since this is a Brownie, it’s fairly easy to make with minimum wastage (unlike Carved Cakes, Sugar Flowers, Entremet etc. Which will have a higher waste %)

So, 5% of 592 ~ ₹29/-

🔶STEP 3
Hidden Costs.
If you have a studio or a professional space dedicated to Baking, then you have to consider all expenses.
For home, Let’s assume you live in a rented house with your Partner. And you’re going to split all the bills 50-50.

For ease of Calculation we’ll assume the following monthly –

  1. Rent – ₹20,000/-
  2. Electricity – ₹10,000/-
  3. Water – ₹1000/-
  4. The income of Staff (or Maids) – ₹1000/-
  5. Any other fixed costs that you have monthly – ₹1000/-

Total Monthly Fixed expenditure = ₹33,000/-
You’re bearing half of it, so = ₹16,500/-

Let’s assume you get AVERAGE orders 2 per day.
The word “Average” is very important here because you might get 4 orders one day and 1 order another day. And some orders might take longer than the others. But we have to see average, for ease of calculation.

Fixed Expense per Month = ₹16,500/-
Per Day = ₹550/-
Per Order = ₹225/-

Since Brownie is a simple bake, which doesn’t take a long time, let’s assume you cut down this fixed cost to ₹150/-

🔶STEP 4
Let us presume Cost of your fixed assets (AC, Fridge, Freezer, Oven, Tools, Equipment etc.) = ₹1,25,000/-
Current depreciated Value = ₹1,00,000/-

Now, this is subjective to every entrepreneur. But let’s presume you take 0.1% of this for each order.
i.e 0.1% of 1L = ₹100/-

🔶STEP 5
Your Labour Cost.
This depends on how you value yourself. How much experience and expertise you have. What your skill level is.

Let’s presume your per hour cost = 150/-
And let’s say it takes effectively 4 hours (on average) to make the batter, bake, cool, cut, wrap the Brownies.

So, your labour cost = ₹600/-

🔶STEP 6
Cost of Additional Items.
i.e. cake boards, wrappers, packaging, candles, knife, Ribbon, Tissue Paper, notes, Cake stand… Bla bla bla… everything!

For Brownie, you will have the following –
Cake Box, Cake Board, Note, Tissue.
= ₹150/-

🔶STEP 7
Profit Percentage.
Let us see what the total of the above is.

592 +29 +150 +100 +600 +150 = ₹1612/-

To this, you can put a profit % according to what you deem fit. It can be 50%, 100%, 200% totally up to you.
You can put a % according to your demand, popularity, uniqueness, the value of time and skill etc.

For a Brownie, I would put a lower % than let’s say an Entremet or a Wedding Cake.

Let’s presume we put 50% profit to this ~ ₹810/-
So total cost = ₹2422/-
Rounding off to – ₹2400/-

🔶STEP 8
Over and above this, you will add tax. According to your eligibility and tax bracket.

Let’s assume you don’t have additional tax for now.

🔶STEP 9
Delivery Charge.
Now, this according to me is separately added to the bill IF you’re using a third party service.
You can charge in actual.
If you have a driver or you do deliveries yourself, then you can have a standard cost added to every order according to the distance of delivery.
Let’s say you add 100/-

Final Total Cost for 1 kg of FUDGY EGGLESS BROWNIE (16 Standard Pieces) = 2500/-
Cost Per Piece ~ ₹156/-
………………………………………………………..
Now, this cost will vary according to the recipe, your Art, Skill Level, Market, as per all the variables given in the post.

You can bring your costs down by the following –
1) Work in a rent-free space.
2) Buy ingredients in bulk. Bulk pricing is always lesser than buying small quantities.
3) Use cheaper ingredients. Although I DO NOT recommend compromising on quality.
4) Increase the number of orders per day so the hidden costs get divided.
5) Or you can lower your profit margin on individual orders for the initial time. And increase your price gradually as and when your popularity and demand increases.

Revise your costing every year to ensure you’re on top of your list.
It will help if you have a set menu of Desserts. And Cakes with Fondant and customization like figurines and flowers, have cost for each one (or each type) of these, so you can quickly calculate the cost.

Hi everyone!

Update –
Here’s the Part – 2 of this post with an actual EXAMPLE of costing – https://smritisspecial.in/lets-talk-pricing-part-2/

Costing is a long and complex subject, this is just my attempt to simplify some things for a beginner in this business.
The post is long, but trust me, you will have to do these calculations, ONLY ONCE IN AN YEAR (will differ for bigger businesses).
But it will help you in the long run.
You will exactly know how much you’re making, and whether your business is profitable or not.

I know the popular pricing choice that people make is –
(Cost of ingredients) x 2 or 3.
But this is absolutely absurd. While it might work for some scenarios, most of it will change according to where you live, work, bake and sell.

Disclaimer –
Terms mentioned below ARE NOT technical terms. This is just my way of breaking it down to make you understand, if you’re already an established Baker, please feel free to add any helpful pointers in the comments.

While pricing your creations, you have to consider the following :-

DELIVERABLES –

  1. Cost of ingredients
  2. Cost of additionals – cake boards, wrappers, packaging, candles, knife, Ribbon, Tissue Paper, note everything.
  3. If there’s any cutters, tools or stuff you had to specially purchase for a particular order, you charge in actual. Eg. Elephant Cookie Cutter.
    If you think, you’ll be using the cutter many times in future orders then you can only put a % of the cost. But if you think you won’t use it much, but the actual cost.
  4. Delivery charges

HIDDEN COSTS –

  1. % of Electricity.
  2. % of Water
  3. % Rent of the place (if any – be it home or studio)
  4. % of Wastage involved.
  5. % of the cost of equipment that you have in it’s depreciated value.
    This means everything that you’ve got (mostly the major things, but if possible everything) – Oven, AC, Fridge, Freezer, Stand Mixer, Hand Mixer, Tools, Bowl etc.
    It will help if you kept the bills for everything related to this.
  6. % of income you give to your staff (if any – even if it is a maid who washes your utensils)

On to the above calculated cost, you add the following :
Finally comes YOUR PART –

  1. Your labour cost per hour that you put into the creation. (depending on your skill level, Years of experience)
    This is NOT profit by the way. This is just the cost of your labour.
  2. Now your Profit %

And then Taxes over and above your final cost. If you are eligible to Levy
………………………………………………………
⬅️ Here’s a small example for a home baking business. This will be simpler for a commercial setup.➡️

Average Electricity bill per month –
₹10,000/-
Electricity per day –
(10,000 ÷ 30) = 334/-

Average orders per day – 2
In simple maths, you will add 334÷2 = 167/- to each order.

If there is an order that takes longer than a day to make, let us presume 3 days to make.
And in those three days, it is the only order you’ve done, then,
334 X 3 ~ 1000/-

Now you can cut this value down by two scenarios –

  1. When you have other businesses in the same place.
    Then you divide this electricity, water, rent etc. In the calculations of both businesses.
  2. If you have another earning person in the house who pays the bills.
    Then the electricity gets divided between the number of people paying the bill.

Let’s say you and your husband pays the bill, you divide it 50-50%.
So you are paying an effective bill of 5000/-
This division is subjective if you want to do 60-40 or 70-30. That is your choice.

Then the rest of the calculations will be the same as above.

You can also choose to put a percentage of the bill in your orders instead of the whole 10,000/- and pay the rest of the bill with your income (profit). That is your choice.

Hi everyone!
COCOA POWDER
We were having a little discussion in one of my groups. And I thought this could be helpful for you guys as well.

Cocoa liquor (or 100% Chocolate) that is extracted from the cocoa beans is pressed with pressing machines to extract cocoa butter.
The residue is cocoa powder.

You know how chocolate is made right?
If you don’t, please read this article.
https://smritisspecial.in/theory-of-chocolate/

Due to the fermentation of bean (read article), real chocolate is actually a little sour. (More sour means inferior quality of beans. Mishandling, over fermentation, bad batch of beans etc.)

After the extraction of cocoa butter, the remaining cocoa powder is EXTREMELY SOUR (Acidic in nature).

For many years this was just a waste product of the Chocolate industry. Until one day Van Houten (yes that chocolate guy!), decided that they want to make more profit by selling it.

So they decided to ALKELIZE the cocoa powder to make it neutral and consumable. (Remember from middle school how Acid cuts base and vise versa?)
Van Houten was Dutch. So the alkelization process was named ‘DUTCHING’.
The chemicals used in the process, darkens the cocoa powder as a reaction.

Remember how I wrote, more sour means inferior quality. Also, more sour means it requires more neutralization. Therefore more dutching. The more the dutching, the darker the cocoa.

A batch of powder extracted from good chocolate, won’t be so sour. Therefore won’t need so much processing. Therefore lesser dutching, therefore, lighter colour!!

So, darker the cocoa powder, you can assume that it’s undergone more Dutching, which means it was made from an inferior quality Chocolate. Which means it won’t have much flavour!!

Now, darker the Chocolate, richer it looks, so the companies play on this mind set of people and sell dark (highly processed) cocoa powder.

Cocoa powder in its natural form is acidic. And the Alkelization process (Dutching) of cocoa powder makes it neutral. So we can use Baking Soda with Dutch processed cocoa powder.

With natural cocoa powder, since it is acidic, there won’t be much affect of the baking soda or baking powder since there’s already an acid present.
Also depends on how acidic the natural cocoa is.

The CHEAPEST of the cheap cocoa powder makers sometimes grind this husk into super fine powder and add some artificial flavour and colour to it and sell it as cocoa powder.
That’s what your so called Malaysian Cocoa powder crap is made up of. You know the ones which are sold in lose packets.

Premium Brands like Valrhona and Callebaut make dark cocoa powders to appeal to the public’s need of ‘dark cocoa powders’. But to maintain flavour, they add a small percentage of cocoa butter back into the cocoa powder. Which makes it smell delicious and taste good too.

Be careful about what you buy guys! And never buy anything which doesn’t have a label on it!
Unless you know the source!!

Picture Courtesy – Google (For reference)

Ingredients –

  1. Olive Oil – 3 tbsp
  2. Garlic – 7 large or 10 small cloves
  3. Dry chilli flakes – 1 tsp
  4. Dry Oregano – 1 tsp
  5. Dry Basil – 1 tsp
  6. Onions – 1.5 cups
  7. Mushrooms – 1 kg
  8. Salt – 2 tsp
  9. Black Pepper – 2 tsp
  10. Water – 1 cups
  11. Milk – 750ml – 800ml
  12. Marmite (Optional) – 2 tsp
  13. Light Cream – 1/2 cup
  14. Fresh Parsley / Corriander – handful for top

Procedure –

  1. Heat Olive Oil in a pot and add Garlic, Chili Flakes, Oregano and Basil. Let it sizzle slightly.
  2. Add chopped Onions and saute till slightly translucent.
  3. Add chopped Mushrooms, Salt, Pepper, Water and let it cook until the mushrooms break down.
  4. Add Milk, Marmite and boil for 4-5 minutes. Then blitz it with a stick blender.
    If you don’t have a stick blender or want a smoother soup, then cool down the mixture and blitz in a mixi till completely smooth.
  5. Add cream and heat for 2-3 minutes. Thin it out with some milk or water if you want a thinner soup. If you’re doing that, then boil for 5-6 minutes.
    Serve warm garnished with chopped Coriander or Parsley.

For the boats :

  1. Zucchini – 2 medium
  2. Vegetable Oil – 3 tbsp
    3.Salt – 1/2 tsp
  3. Black Pepper Powder – 1/2 tsp
  4. Garlic Powder – 1 tsp
  5. Kashmiri Lal Mirch Powder (mild red chilli powder) – 1/2 tsp

For the Filling :

  1. Avocado / Vegetable Oil – 2 tsp
  2. Cumin (Jeera) – 1 tsp
  3. Black sesame – 1/2 tsp
  4. Fennel seeds (Saunf) – 1 tsp
  5. Nigella seeds (Kalonji) – 1/4
  6. Chopped Onion – 1/2 cup
  7. Garlic – 1 clove
  8. Fresh Ginger – 1″
  9. Dry Black Eyed Peas (Lobia) – 1/4 cup + 50g
  10. Dry Green Chickpeas (Choliya) – 1/4 cup + 50g
  11. Mixed Sprouts – 3/4 cup
  12. Salt – 1 tsp
  13. Green chilli – 1
  14. Amchoor – 1 tsp (Or use lemon juice)

Optional Topping :

  1. Pomegranate seeds for garnish
  2. Grated paneer for garnish
  3. Chopped Corriander for garnish

Procedure –

  1. Cut the head and tail of Zucchini and slice in half lengthwise and spoon out the seedy bits from the centre. Don’t make it too thin.
  2. Mix together chilli, pepper, garlic powder (or fresh garlic), salt, oil to make a flavouring for the zucchini boat.
  3. Brush this oil into the centre. And brush little oil on the outside of the zucchini so that gets roasted too.
  4. Bake in a preheated oven at 200°C for 15-20 mins. Keep an eye on it.
  5. For the Lentil filling, pour oil into a pan, add green chilli and garlic to saute.
  6. Add Cumin (Jeera), Fennel (Saunf), Black Sesame (Til), Nigella (Kalaunji) Seeds, Grated ginger into the pan. Saute till fragrant.
  7. Add chopped Onion and cook until slightly translucent.
  8. Add cooked Lentils and sprouts of your choice and salt. Mix together and cook for 3-4 minutes.
  9. Add dry mango powder (Amchur) off the heat. If you don’t have that, squeeze some lemon for a slight tang.
  10. Fill up the boats with the Lentil mixture. Serve it with fluffy rice. Topped with fresh Coriander, Feta (or paneer), Pomegranate Seeds.

Ingredients –

  1. Lady Finger biscuit / Any light biscuit like Marie – 150g
  2. Good Strawberry Jam – 50g
  3. Water – 50g
  4. Baileys Strawberry / Strawberry Vodka – 50g
  5. Lemoncello – 50g (or Lemon Vodka, or leave it out)
  6. Dairy Whipping cream – 250g
  7. Cream cheese – 100g
  8. Icing / Powdered Sugar – 5 tbsp ( divided 3 + 2)
  9. Vanilla Extract – 1 tsp
  10. Fresh Strawberries – 200g – 250g
  11. Dehydrated Strawberry + Sugar for topping (optional)

Procedure –

1) Whip Cream to soft peaks. Then add 3 tbsp Sugar and Vanilla Extract to it and whip again to semi-stiff peaks.
2) Whisk Soft Cream Cheese with remaining Sugar until combined.
3) Add Cream Cheese mixture to Whipped Cream and whisk to combine.
4) Make sure not to whisk too much as your dairy cream will split and turn to butter.
5) For dipping mixture, combine Strawberry Jam with hot water and mix. Then add Lemoncello, Strawberry Bailey’s.
6) Dip ladyfinger biscuits into the dipping liquid and layer in a pan or glass.
7) Add a layer of Cream.
8) Followed by a layer of freshly cut strawberries.
9) Make as many layers as your pan /glass can take.
10) Chill in the fridge for 5-6 hours or overnight to set.
11) Just before serving, dust it with some strawberry sugar (dehydrated strawberry ground with some sugar). Or dust it with plain icing sugar.
12) Serve cold and enjoy!

Ingredients

  1. Drinking-Water for blanching
  2. Broccoli florets – 2 cups
  3. Cauliflower florets – 2 cups
  4. Salt for blanching – 3 tbsp
  5. Butter – 3 tbsp
  6. Olive oil – 2 tsp
  7. Garlic – 2 large or 3 small cloves
  8. Onion – 3/4 cup
  9. Rosemary – 1 tsp
  10. Dill – 1 tsp
  11. All-Purpose Flour (Maida) – 3 tbsp
  12. Warm Milk – 750 ml
  13. Salt – 1/2 tsp or to taste
  14. Black Pepper Powder – 1.5 tsp
  15. Grated Mozzarella – 1 Cup (or to taste)

Procedure

  1. Boil water for blanching and then add salt. Let it come to a gentle simmer.
  2. Add broccoli and cauliflower florets and let it be in the blanching water for 1 minute in summer.
  3. Take it off the heat and keep aside.
  4. Add Butter, Olive Oil, in a pan and melt.
  5. Add chopped Garlic, Dill, Rosemary and Onion. Let the onions become a bit translucent and slightly golden.
  6. Add All-Purpose Flour (Maida) and cook until it is fragrant.
  7. Add warm Milk and mix quickly to avoid lumps. Cook on medium heat stirring continuously, until the sauce thickens.
  8. Add salt and pepper to taste.
  9. Mix this sauce with the blanched broccoli and cauliflower florets. And pour in an oven-safe dish.
  10. Bake it in the oven at 180- 200°C for 15 minutes. Then take it out and add the grated cheese on top. Bake again for 5 minutes until the cheese is golden on top.
  11. Serve with some bread, Pasta or Rice.